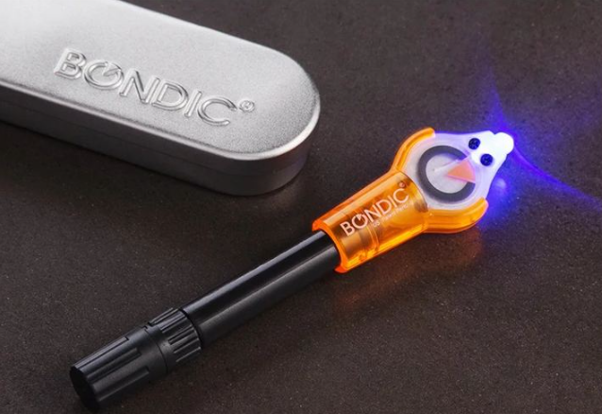
Bondic is a welding substance that is a better substitute for a superglue. Yet it works completely different from superglue. With superglue, it dries with air and tends to get messy all around it.
Whereas bondic is a liquid plastic polymer that creates a strong bond in the applied surfaces without any mess. Because bondic requires a UV light to harden on the applied surface, that takes about 4 seconds.
Unlike superglue you don’t need separate glue to bind, bondic works on any surface, whether it’s wet or dry, even with glass surfaces. In the following segments, we’ll go through how it works, and how you use it on glass surfaces.
How Does Bondic Work?
As stated earlier, bondic is a binding substance that provides you much stronger wilder than a superglue. It basically replaces the superglue.
Our bondic review shows that bondic contains a liquid plastic adhesive component that only activates while a UV light shines upon it and hardens.
Glues work by sticking two flats surfaces together, but bondic gives a unique ability to rebuild shapes and sizes. Because with the UV light, only you decide when and where it can stick. You can even use it to give 3D shapes over any surface.
Whether it’s filling or mending you can use the bondic to do anything on any surface, and you’re ready to apply the UV light to fix it in place and reshape it however you like. All you have to do is follow 4 simple steps:
- Clean
- Apply
- UV rays
- Reshape (Optional)
Can You Apply Bondic on the Glass surface?
Many of you are wondering that bondic works on glass surfaces, right? Well, yes. As we mentioned in the beginning, its liquid plastic polymer allows it to stick to any surface, even glass whether it’s dry or wet.
Whether it’s mending broken glass or crafting a unique design on glass surfaces you can use bondic to do anything. As it is only hardened by UV rays, it provides unique flexibility, unlike any other glue.
How To Use Bondic To Repair Broken Glass?
Glass is the most delicate material, unless a double reinforced glass, it’ll easily break. And mending a broken glass is quite bothersome. However, with bondic, it’s much easier.
As stated earlier, you can use the bondic to mend a broken glass. Now the question is how right? No worries, we’ve prepared proper instructions for mending broken glass using bondic.
Let’s get started, shall we?
Step-1 Prep The Glass
First, you have to prepare the broken glass, here you should clean the glass from any dust/dirt or any chipped pieces from the surface. If the glass surface is filled with such stuff then it affects the bondic effect on the glass.
Then you need to scuff smooth areas, it allows bondic something to hold on to. You can use paper towels to clean the glass. While cleaning the glass be mindful of any broken pieces to avoid any injuries. You can wear gloves to protect your hands.
Step-2 Apply Bondic
After properly cleaning the glass, it’s time to apply bondic. But before you apply it, determine the situation with the glass. Is it just cracked or completely broken?
If it’s creaked- then take the bondic, and apply it over the creaked surface. And if it’s completely broken- then put the pieces together and apply bondic at the edge of each corner.
Step-3 Apply UV Light
Before you apply UV light over the bondic make sure that the glass pieces are aligned perfectly. Because the light will fix the pieces in a permanent place. After aligning the pieces together, shine the UV light over the applied surface on glass for 4 seconds.
Step-4 Reshape It
Next use a shaping tool to reshape the glass edges. In doing so you’ll avoid any sharp edges and also it will allow you to hide the creaks from the glass.
How To Use Bondic To Create A Design On Glass Surfaces?
There are limitless possibilities with bondic designs over the glass surfaces. Because of its liquid plastic component, it goes perfectly with the glass surface. And applying is quite easy.
To create a unique design over the glass surface, make sure you follow the given instructions below.
Step-1 Prep The Glass Surface:
First, clean the glass properly with a paper towel, so that you apply the bondic without any hindrances. Then scuff out the areas you wish to apply the bondic on. Otherwise, bondic won’t be able to stick to the smooth surface of the glass.
Step-2 Prep The Design
If you have the design ready, then try it on a different surface like paper. It’ll give proper practice. As it’s not easy to design glass surfaces because they tend to be slippery. To ensure an accurate design, you can draw out the design with colored markers.
Step-3 Apply Bondic & Uv Light
After you have your preferred design ready, then start applying bondic carefully above the marking design. After that apply the UV light over the bondic to fix it permanently. You can use a shaping tool to reshape it however you like.
Step-4 Apply Color (Optional)
Then if you want color but color over the design to give it a more unique look. Remember to color after applying the UV light not before for obvious reasons.
Last Words
As you can see you can create or mend the glass surface without any hindrances. The flexibility you get with bondic gives you complete freedom to do and fix broken pieces of equipment. However, we don’t recommend it to use to mend large surfaces, as that’ll be quite expensive. Other than that, you can apply it, mend it, reshape it, and paint it instantly.